To change your profile photo, log into your site dashboard and then visit your homepage.. If you are unsure how to do this, please visit our tutorial How To Edit the Home Page.
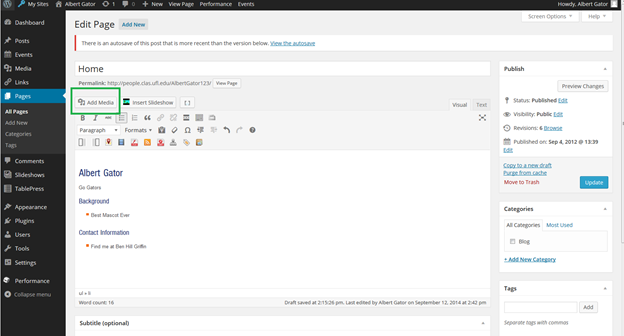
This is what your page will look like when you edit the page.

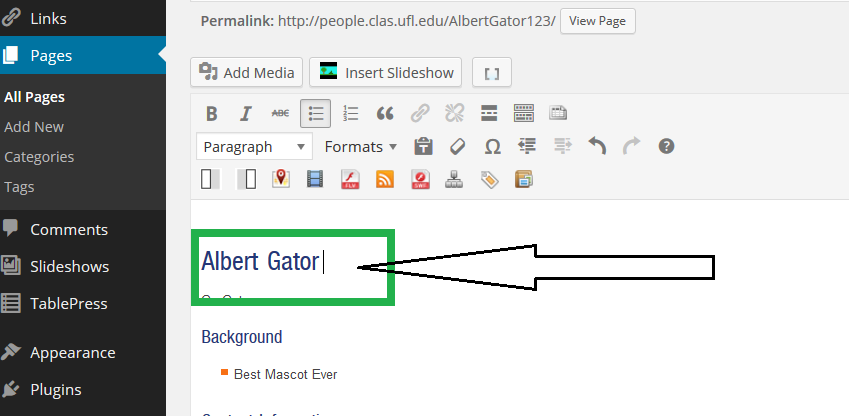
You will now need to place your cursor and click the location where you wish to embed your photo. For most users, you will want to click to the right of the last letter of your name.

Once your cursor is properly placed, scroll up and click the ‘Add Media’ button.

Clicking ‘Insert Media’ will bring you to the following screen. Typically, only the default image will be available. You can ignore this for now.

Next, select the Upload Files tab. This screen will ask you to select the file you want to upload. Click the Select Files button.

The file explorer should open. Navigate through the files on your computer and select the photo of your choice. Click the Open button.

This will then upload the photo to your Media Library. Click the image to select it. A blue outline with a white checkmark will appear on the selected photo.

With the photo selected, you should see the ‘Attachment Details’ section on the right side of the screen. Here you have the option of choosing the alignment and adding a caption. Most people prefer to have their image aligned to the right of the page. To change the alignment, click the drop down menu and change it to ‘Right’.

When you are ready, select the blue “Insert into Page” button. The photo should now show on your homepage:

Important: To save changes to this page, click the blue Update button under Publish on the right side of the screen.
If you decide you want to remove a picture from your page, simply edit your page and click or hover your mouse over the picture. A small icon of a pencil and a small icon of an X will appear as shown below:

Click the “X” icon to remove it from your page. Click the pencil icon to edit the image settings.